---
title: "Concierge Code when Pardot Form is an iFrame"
source_url: https://help.chilipiper.com/hc/en-us/articles/1500010544381-Concierge-Code-when-Pardot-Form-is-an-iFrame
article_id: 1500010544381
updated_at: 2026-04-23T16:54:46Z
---
When using Pardot Forms that are embedded as an iFrame, we use DOM event messages to pass the form submission data along and present a Calendar once Pardot verifies that the submission went through.
Note this does not work with the [native Pardot landing page implementation](https://help.chilipiper.com/hc/en-us/articles/1500011223882) code, and the implementations are not interchangeable. If you update the code below, make sure you update it in all areas.
This article will cover how to successfully implement Chili Piper with Pardot forms embedded in an iframe:
* Add custom code to your Pardot form settings
* Look & Feel → Below Form Code Editor
* Completed Actions → Thank You Code
* Parent Webpage Code
* Optional
* Custom field names using CSS class names
* * *
## Look & Feel → Below Form Code Editor
In Pardot, navigate to your form, under "Look and Feel" open the "Below Form" Source code, and add the script from the link below, being sure to follow directions to replace [[domain]] with your domain and [[router_name]] with the correct router name.
In Pardot, navigate to your form, under "Look and Feel" open the "Below Form" Source code, and add the script below, replacing "calendar" after "var tenantDomain = " with your domain and "test" with the correct router name.
**Please get the latest version of this implementation from**[**here**](https://docs.google.com/document/d/1LAETphmjofMMkNTEfaNrY0qB4dKi-80pLtSofFnXgso/edit?usp=sharing)**.**
**If you need more details on how to collect your Domain and Router names, please check the****Collecting Domain and Router name details** **section right below**
Paste the code in as shown here:
### 
Hit **Confirm & Save**
### Collecting Domain and Router name details
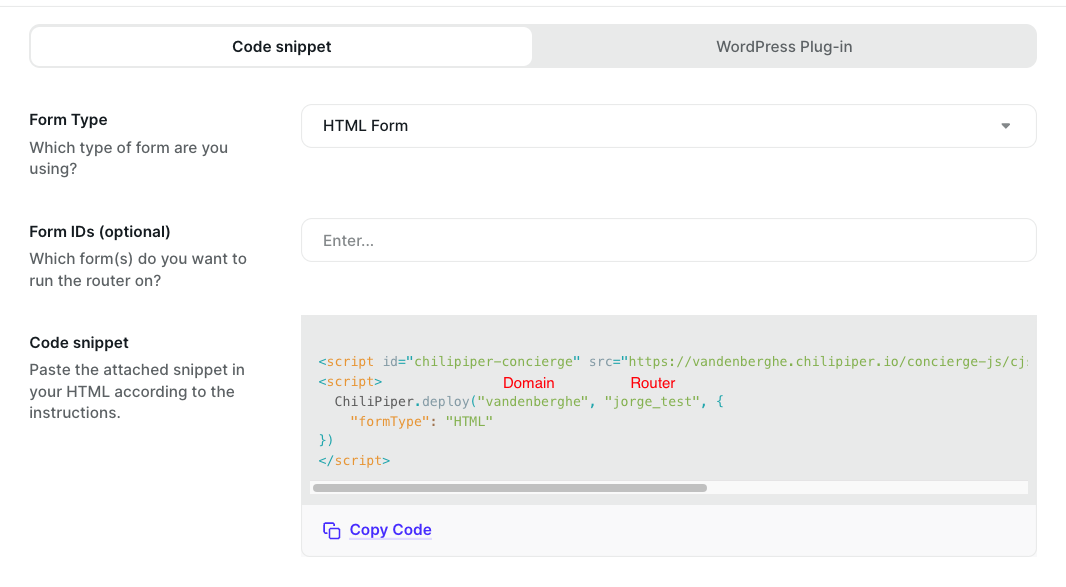
Having your **domain** and **router** names ready is required for the implementation above. They can be found in your inbound router under the Embed code section:
* * *
## Completed Actions → Thank You Code
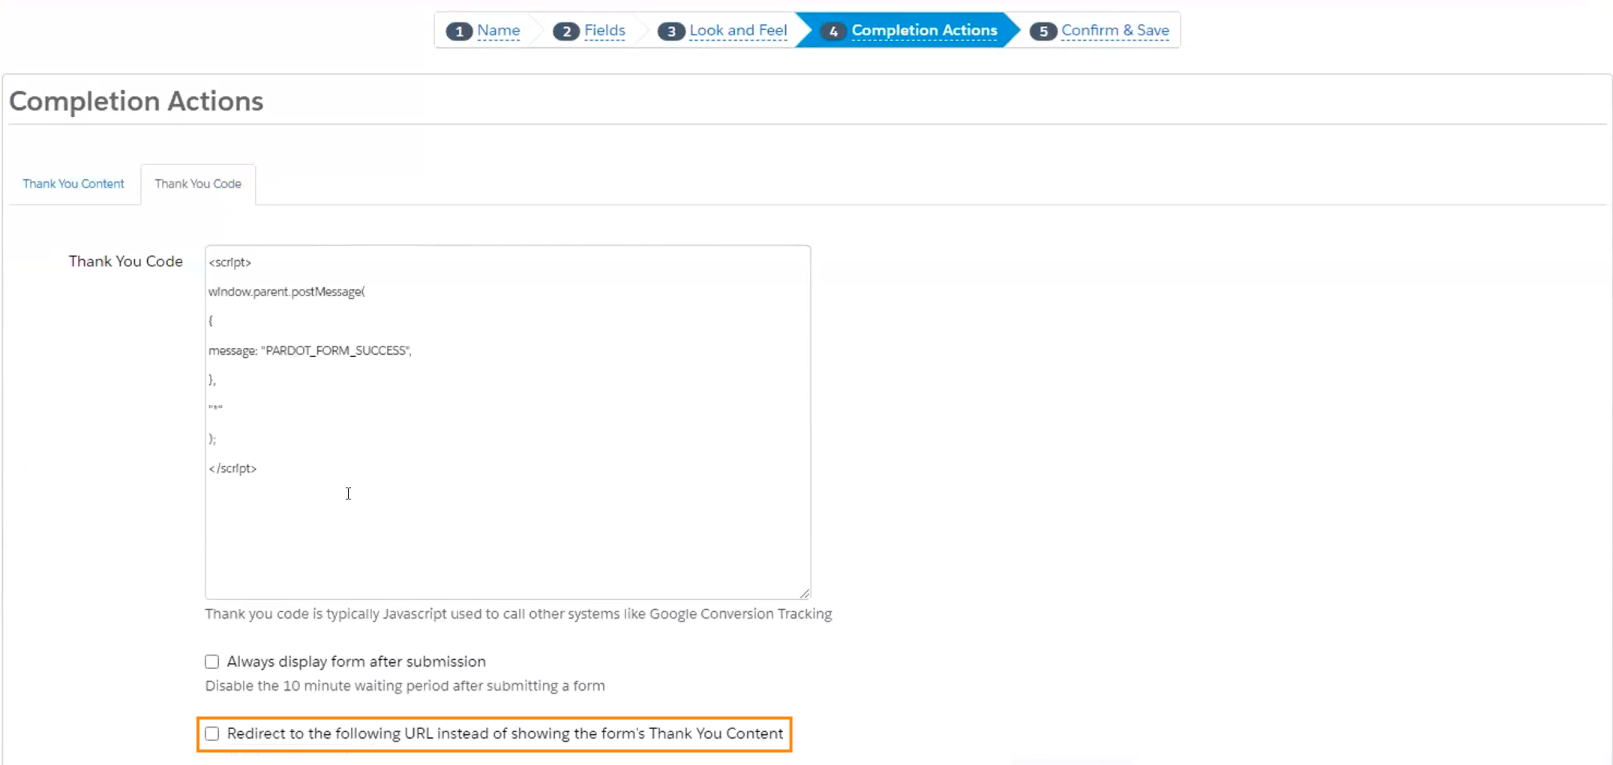
Add the Following Code to the Completed Actions → Thank You Code
Ensure the following option is unchecked in the Completed Actions → Thank You Code tab:
_"Redirect to the following URL instead of showing the forms Thank you Content"_
* * *
## Parent Webpage Code
Add the Following Code to the Parent Webpage which the Pardot Embed HTML code resides.
* * *
## Custom field names using CSS class names
When looking for field names to use, we check the CSS class names first, then placeholders and labels. Sometimes your form labels need to be complex and include some simple instructions, making the label hard to read and use for mapping in Chili Piper. With this implementation, you can specify field names using CSS Class names in Pardot. This will make mapping easier and more predictable.
Here is how to specify a CSS class name on a Pardot field:
* Open your form in Pardot and click the Edit Button - Fields - Small Edit icon next to the field.
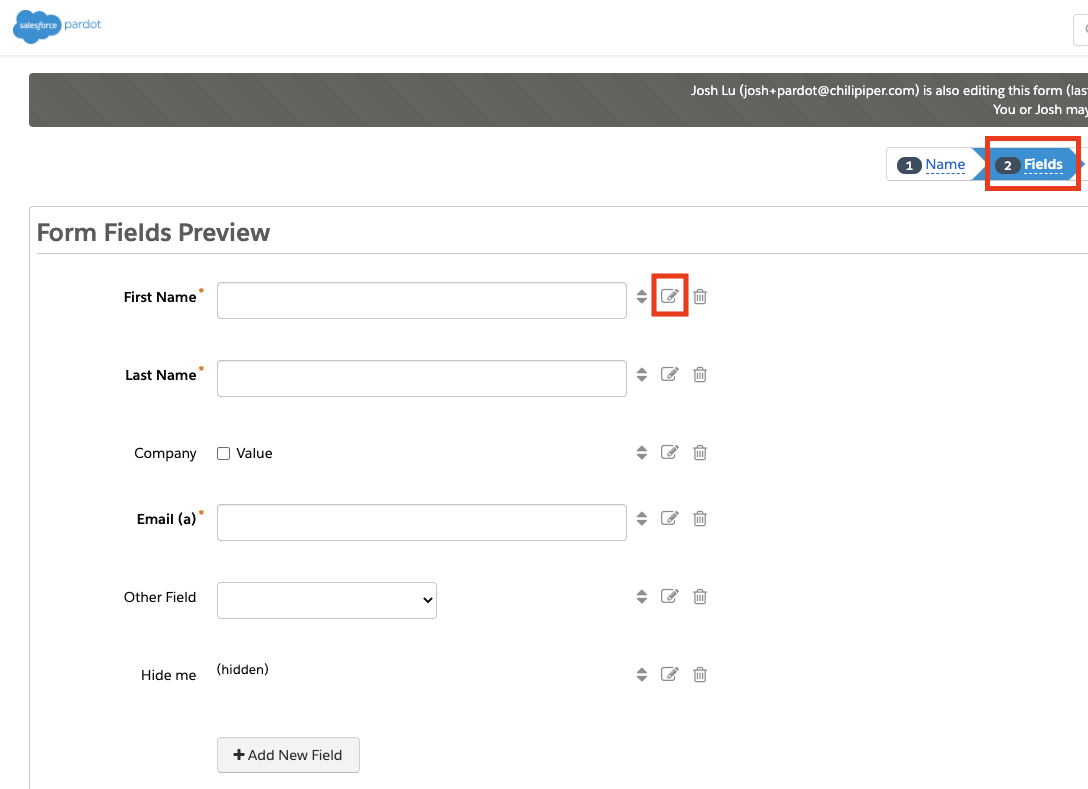
* From here, click on Advanced and enter a CSS Class name starting with "CP_".
For example, "CP_FirstName".
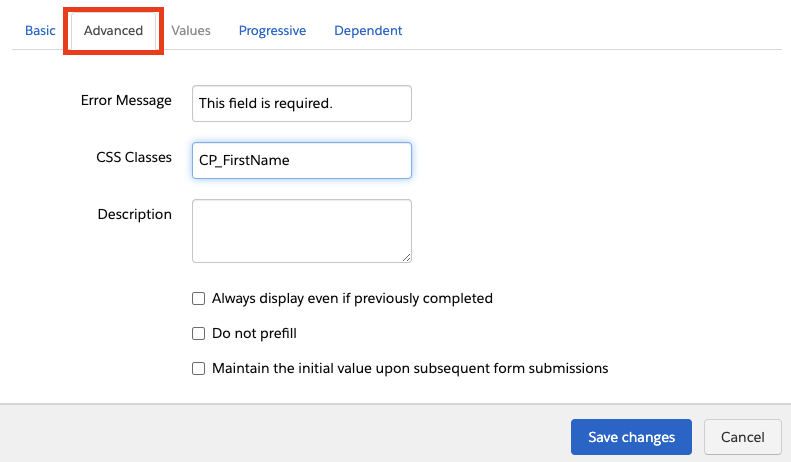
* That's it! Now save and repeat for any other fields you want to specify a name for.
### Exception Handling
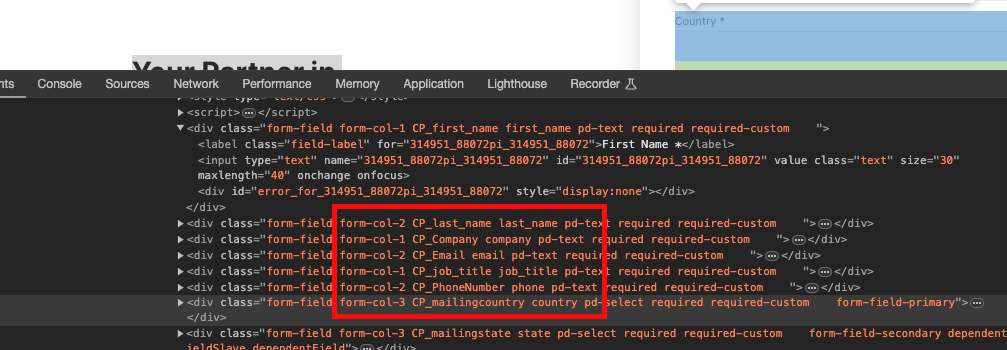
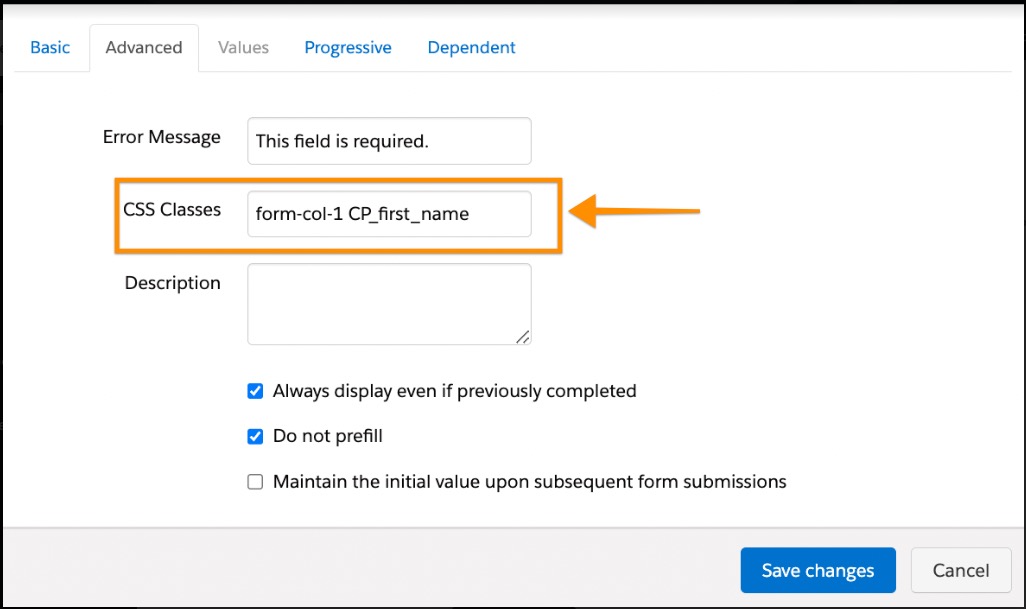
In the event that you are using a **Pardot Form that has 2 Columns** ([reference](https://trailhead.salesforce.com/trailblazer-community/feed/0D54S00000A82j3SAB)), this will require specific CSS Classes to achieve. To also have this work with Chili Piper:
* First input the form-col-1 or form-col-2
* Then space
* Then your CP_fieldname
It should look like the below within your Pardot Form configuration
When the page renders, you should expect to see the HTML on the page like the one below if configured properly: