---
title: "Chili Piper + Gravity Forms - Running Concierge Fire on the same page as the Form"
source_url: https://help.chilipiper.com/hc/en-us/articles/36026833331859-Chili-Piper-Gravity-Forms-Running-Concierge-Fire-on-the-same-page-as-the-Form
article_id: 36026833331859
updated_at: 2026-07-24T18:55:59Z
content_hash: 70fc599b
---
## Who can use this feature?
Available on All Products or Routing & Scheduling
Available to Admins or Workspace Managers
[Billing Center](https://fire.chilipiper.com/fire/admin/billing/overview) [Get a Demo](https://www.chilipiper.com/request-demo?utm_source=zendesk&utm_medium=help-center&utm_campaign=chili-hub)
This integration is unique to Gravity Forms. To follow this guide, you must have the Gravity Forms plugin installed on your WordPress site.
In this article, we will cover how to run Chili Piper on the same page as the form.
#### Table of Contents
- [Pre-Setup Notes](#h_01JE9HTQZ05QF0RJYWRV967T6E)
- [How Does This Method Work?](#h_01JE5YV0QTW9PKDZADHHE1SWTG)
- [Setup Instructions](#01JE6N7KPEN4T2DBHM950H8ZJ3)
[Map form in Chili Piper and get Code snippet](#h_01JBD160QEJGZMXPPPT2N9ENSD)
- [Add Chili Piper script to the page where Gravity Form is being loaded](#01JETM9J5E96QF550XYM3J3N9R)
- [Add Chili Piper script to Gravity Forms Confirmations section](#01JETMTTPMP3232MD3NBPEGAMA)
## Pre-Setup Notes
Before we start, just so you know, if you use **Pardot Form Handlers**, you will not need to change your Gravity Form, but the Chili Piper configuration will be within your**Pardot Form Handler** configuration. [Please see this article](https://help.chilipiper.com/hc/en-us/articles/4406630211859) for more details!
If you use a method that **redirects to a thank you page** to run Chili Piper, as opposed to running Chili Piper on the same page as the form, you should check [this article](https://help.chilipiper.com/hc/en-us/articles/36020992678675/) instead.
## How Does This Method Work?
Gravity Forms will **not** redirect to a thank you page for booking, and the full experience will happen on the **same page** as the form by adding the Chili Piper snippet into two different spots:
- The parent page or the page on which the form is being loaded.
- The Gravity Forms "Confirmations" section.
We recommend setting up a test form and page first before deploying in a live environment.
Also, you must have the Gravity Forms plugin installed on your WordPress site.
## Setup Instructions
### 1. Map form in Chili Piper and get Code snippet
Go to [Concierge Router](https://help.chilipiper.com/hc/en-us/articles/28522554434323-Creating-a-Concierge-Router-in-Demand-Conversion-Platform) in Chili Piper and "Open" the router configured for your web form. Click on the Trigger "**Webform is submitted**" and ensure the Form Field Name matches your webform field names. See [this article](https://help.chilipiper.com/hc/en-us/articles/28929554231187-Form-Mapping-in-Demand-Conversion-Platform-s-Concierge) for more on mapping.
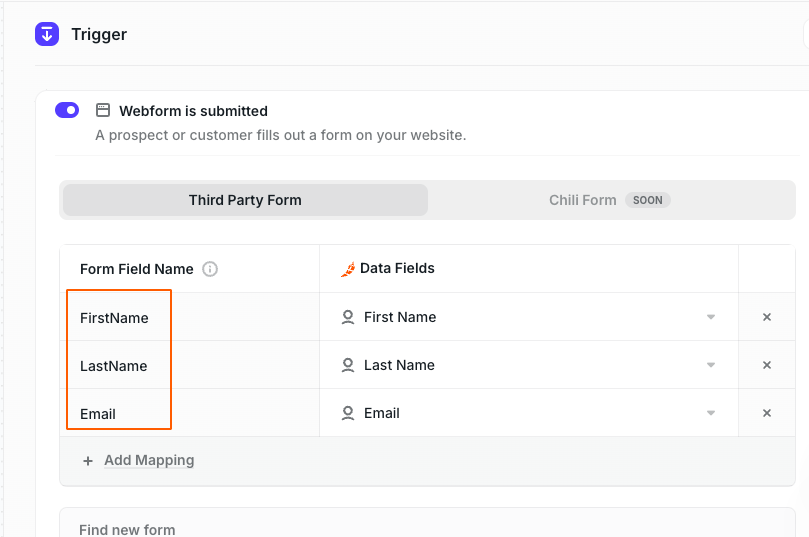
Once your form mapping is done, the next step is to get the code snippet to be used in Gravity form and on the parent page where the form will be loaded.
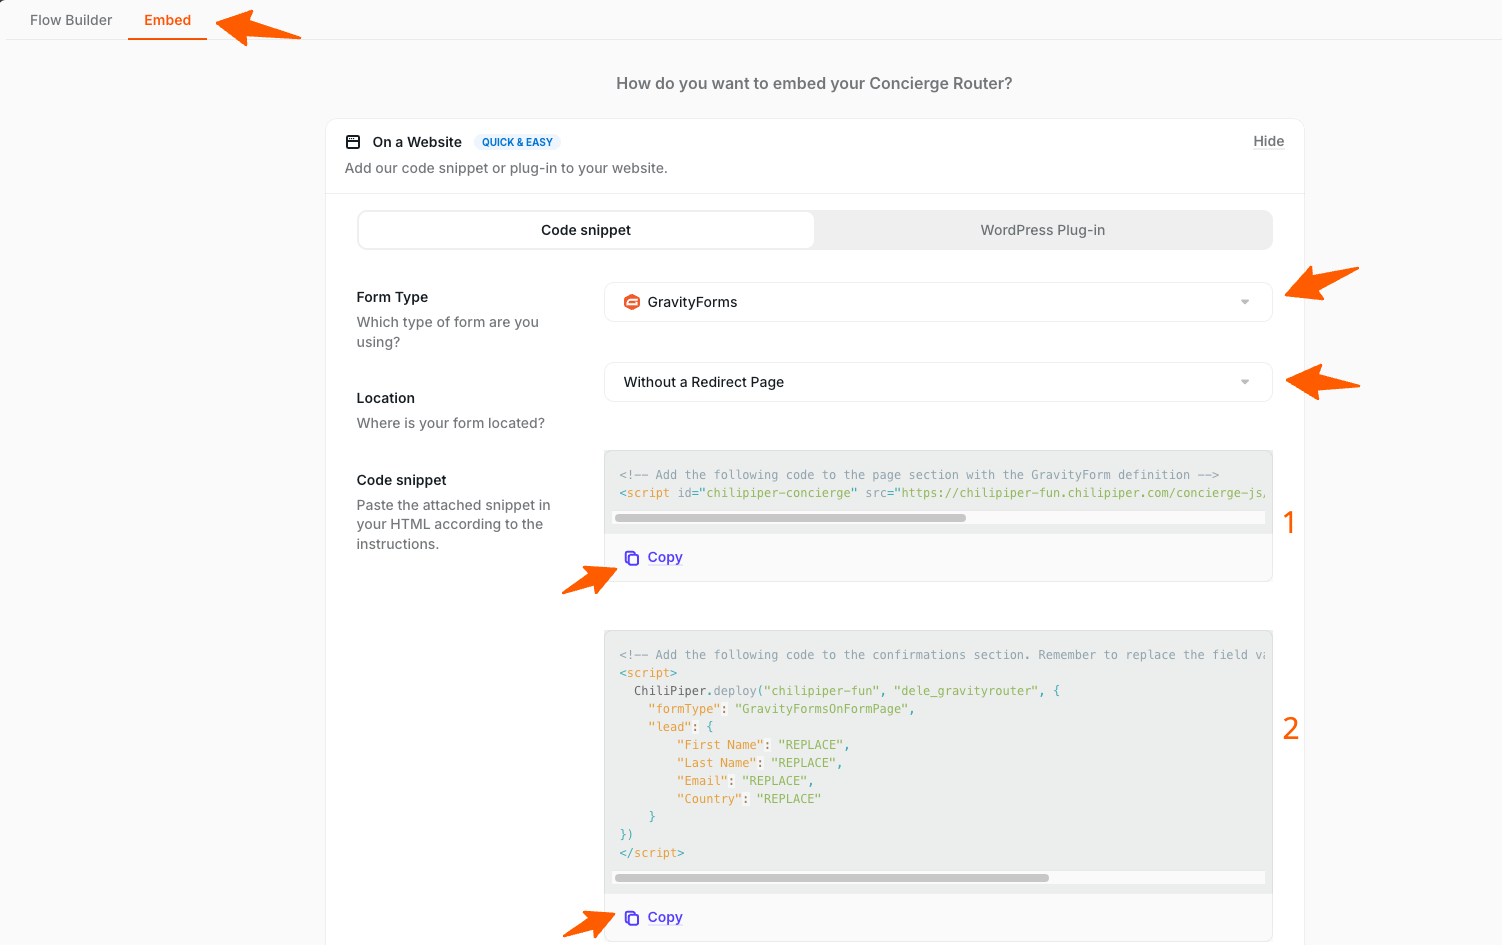
Click on the "**Embed**" section within the router flow builder.
- Click "**On a Website**" and select "**GravityForms**" from the Form Type dropdown. Then, select the option "**Without a Redirect Page**" from the Location dropdown. A code snippet like the screenshot below should be generated. The snippet has two scripts, which we have labeled **1** and **2**.
1. To be added to the parent page or the page on which the gravity form is being loaded.
- 2. To be added in Gravity Forms' "Confirmations" section.
Copy the codes!
### 2. Add Chili Piper script to Gravity Forms Confirmations section
Within Gravity Forms:
- Go to the Form → Settings → Confirmations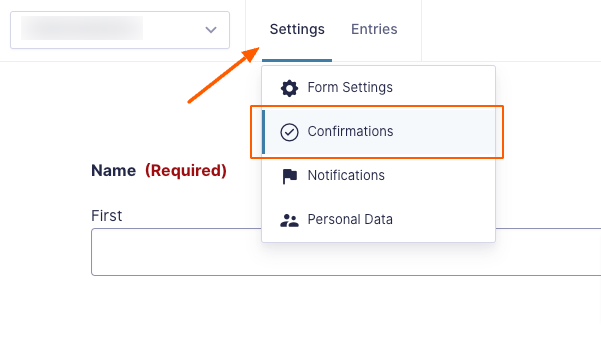
- Edit the "Default Confirmation" within Gravity Forms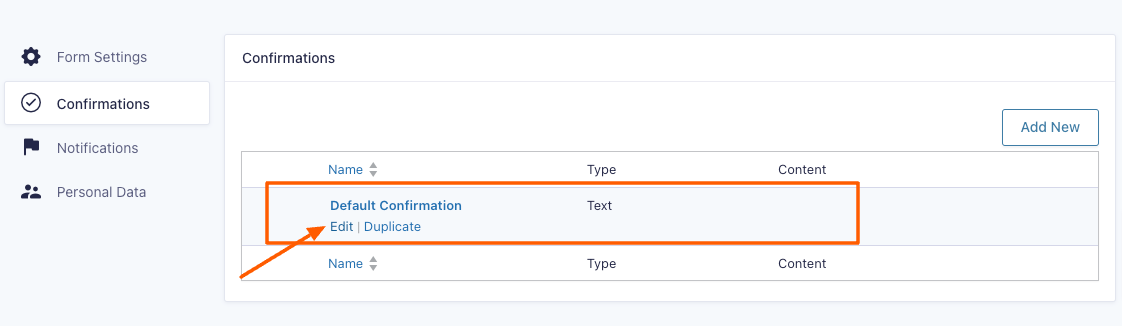
- Here we add both parts "**1**" of the Chili Piper snippet and the one labeled "**2**" in the previous section. This will look something like the following. **Note that you should ideally retrieve the code from the Embed section, and not from this article**:
Check that the "Confirmation Type" is "Text" and "Disable auto-formatting" is checked.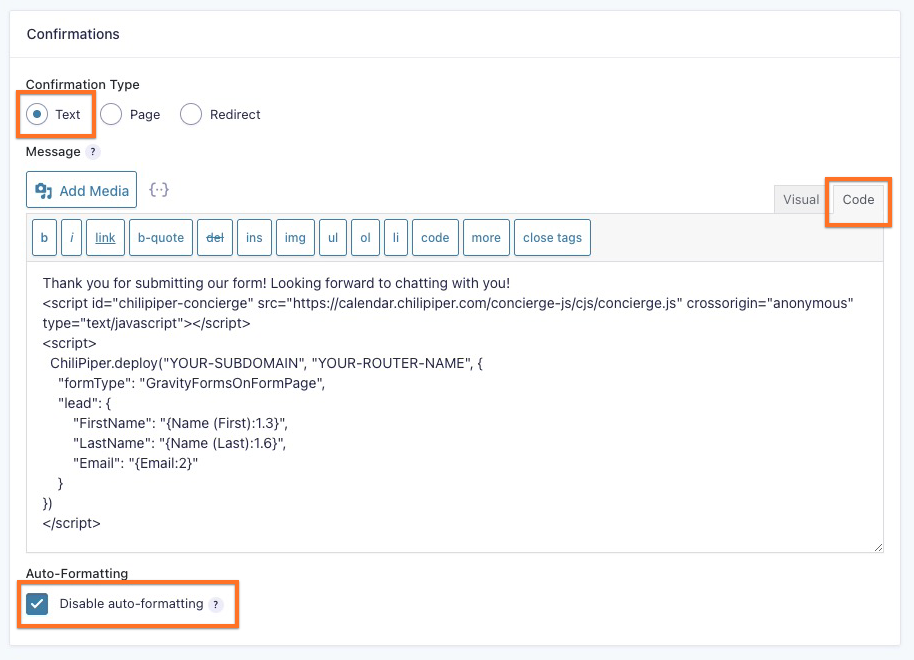
- In the Confirmation section in Gravity Form, insert the respective merge tags and add in any other field values that need to be submitted to Chili Piper for routing purposes. You are not limited to just the merge tags, but can also provide manual values here too.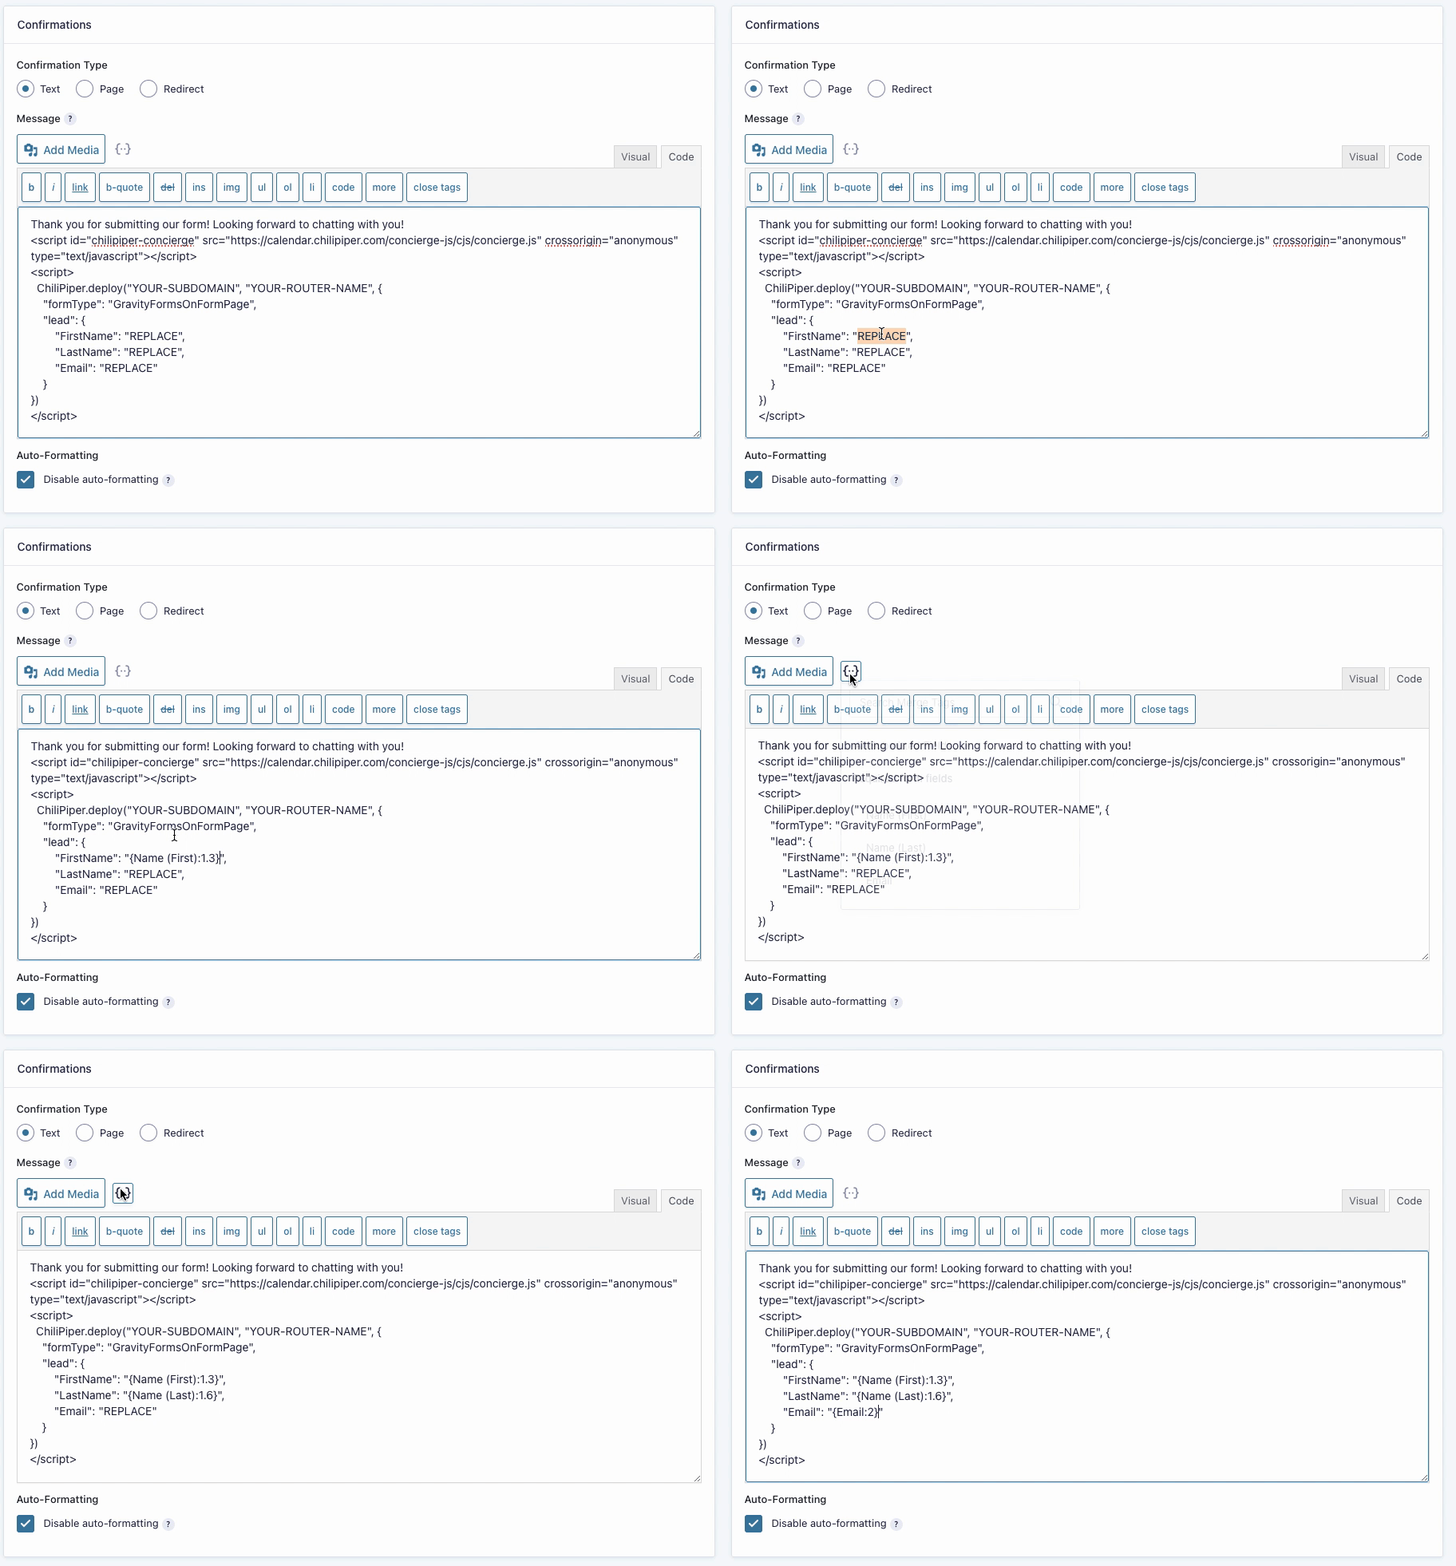When adding other form values, such as Company, Phone, Country, Title, etc to pass along to Chili Piper,
Remember to add a comma when adding additional fields.
- Do not add any spaces in your field names sent to Chili PiperInstead, remove any spaces or add an underscore, like so:
"lead": {
"FirstName": "REPLACE",
"LastName": "REPLACE",
"Email": "REPLACE",
"Job_Title": "REPLACE"
}
"Save Confirmation" in Gravity.
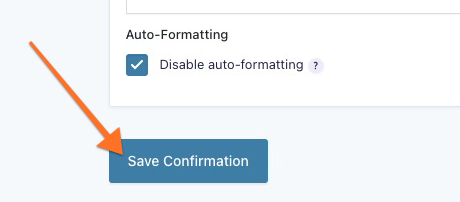
This will save the changes on the parent page, and now you can test your form!