---
title: "Setting Up an Integration with Chili Piper and Instapage Forms"
source_url: https://help.chilipiper.com/hc/en-us/articles/360053797633-Setting-Up-an-Integration-with-Chili-Piper-and-Instapage-Forms
article_id: 360053797633
updated_at: 2026-07-24T18:56:03Z
content_hash: 9424fbeb
---
Please follow this guide to integrate your Chili Piper Inbound Router with Instapage Forms.
- Create and configure your Chili Piper Inbound Router - [See here for instructions](https://help.chilipiper.com/hc/en-us/articles/360053021874)
In your Inbound Router, enable the option "Chili Piper creates lead in Salesforce real time".
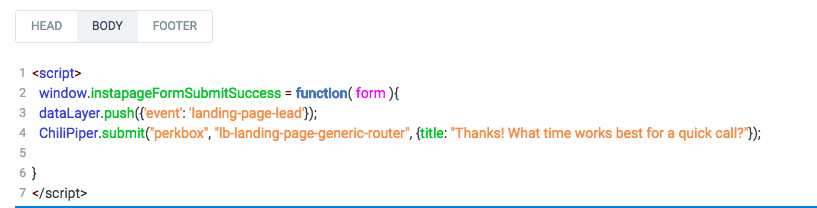
- After creating your Instapage page, go to "Settings" -> "Javascript", and in the **Body** section of Instapage, insert the following code and edit with your account parameters:
```
```
3. Add an HTML Element to your Instapage page and put it directly under your form.
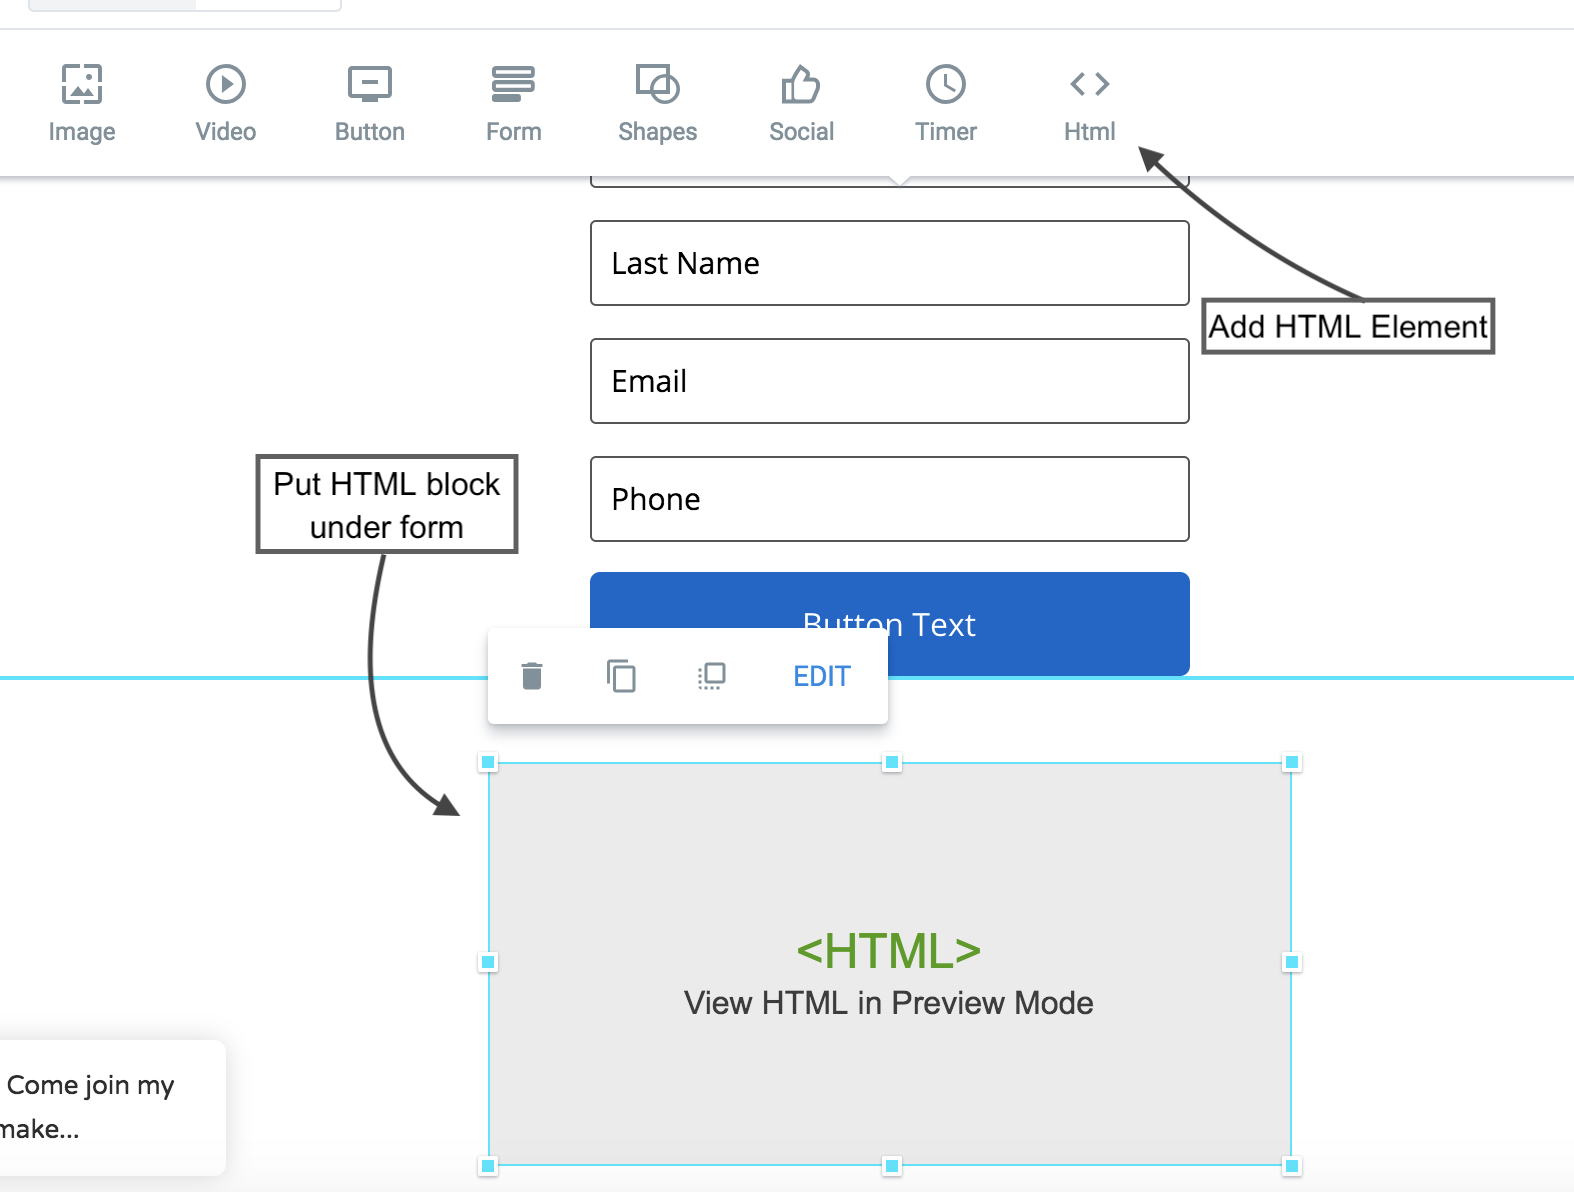
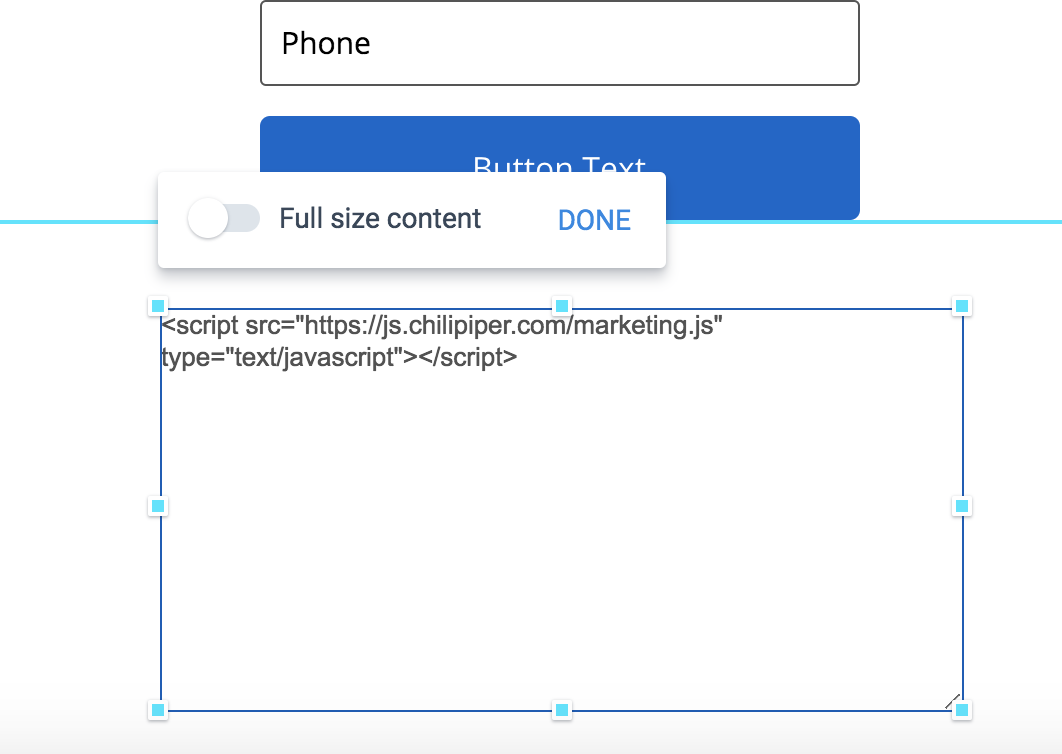
4. Edit theblock and add the following code:
```
```
Your HTML block should look like this:
5. Publish your page and test your integration!
**Note:** Do not enable the setting to redirect after form submission in Instapage. You will configure the redirect for people who book a meeting and people who do not book a meeting in Chili Piper.
**Pro Tip:**You can also include the data layer push to help track conversions.